Tech - Azure DevOps Cool Features Part 1
I’ve spent a fair bit of time recently migrating some system’s CI/CD over to Azure DevOps, so here are some cool features I’ve found along the way.
GitHub integration with Azure Pipelines
GitHub is still our preferred git repository, and when GitHub Actions isn’t suitable for a system to build/deploy we can integrate that repository with Azure DevOps Pipelines.
It’s possible to connect with your own Personal Access Token (PAT), but this isn’t ideal if that person leaves the company, where that integration will also be removed.
Instead you can connect using the Azure DevOps app in GitHub, which grants it access to select repositories.
It’s not ideal security wise because it asks for a lot of permissions (i.e. read/write), most of which are only needed to help setup a build pipeline yml file, so that needs to be weighed up against using a PAT.
Links
Build Pipeline
There’s so much that could be covered here in terms of the features available to Build Pipelines. Depending on your needs, GitHub Actions does support most the same features.
Here a few key features we’ve found useful:
Parameters
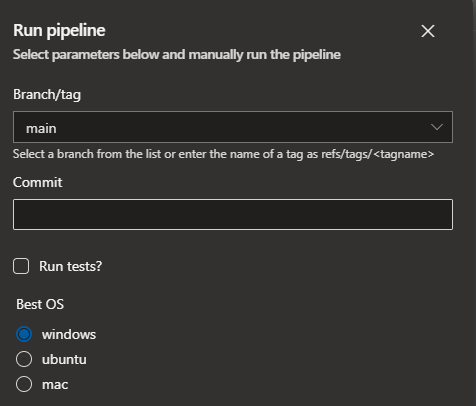
If you run Builds manually you can have parameters presented to you in the Run Build dialog. There is quite a few types supported, GitHub Actions only support a basic input (more info).
- name: runtests
  displayName: Run tests?
  type: boolean
  default: false
parameters:
- name: image
  displayName: Best OS
  type: string
  default: windows
  values:
  - windows
  - ubuntu
  - mac

trigger: none

jobs:
- job: build
  steps:
    - script: echo $
Schedules
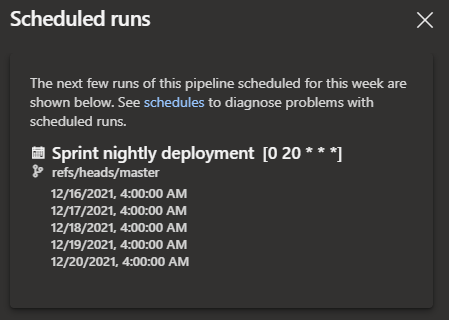
DevOps can show a projected schedule for a Build pipeline which is helpful to confirm your CRON expression is valid and that it occurs at the correct intervals (it will convert the UTC CRON to your computers timezone).
schedules:
- cron: "0 20 * * *" # 8pm UTC, 4am +8
  displayName: Nightly deployment
  branches:
    include:
    - main
  always: true
Tests
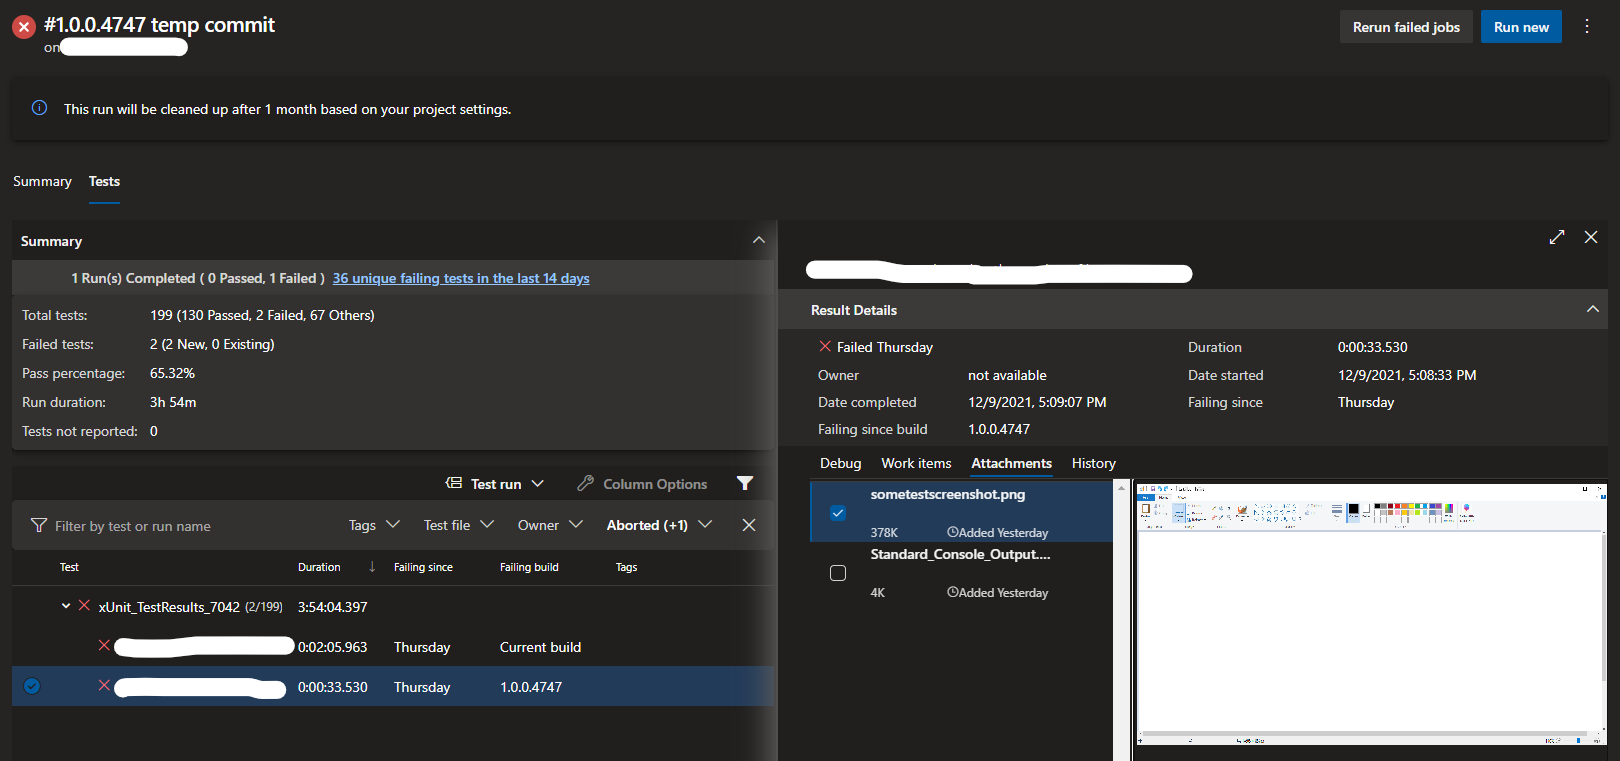
This is a major feature that is not supported in GitHub Actions, where tests can be reported and tracked over time, useful for seeing a summary of failures and any deviation in test results.
Depending on what test formats you use, it is possible to add custom attachments to the tests, this has been particularly helpful for failing UI tests.
With xUnit it doesn’t support the required result format to include attachments, but using the API (linked below) you can upload the image to specific test run as part of your pipeline.
Links
- https://docs.microsoft.com/en-us/azure/devops/pipelines/tasks/test/publish-test-results?view=azure-devops
- https://docs.microsoft.com/en-us/rest/api/azure/devops/test/attachments/create-test-run-attachment?view=azure-devops-rest-6.0
Restricting builds to certain agents
In Azure DevOps you get a pool of Hosted agents which is available to all the projects in your organization.
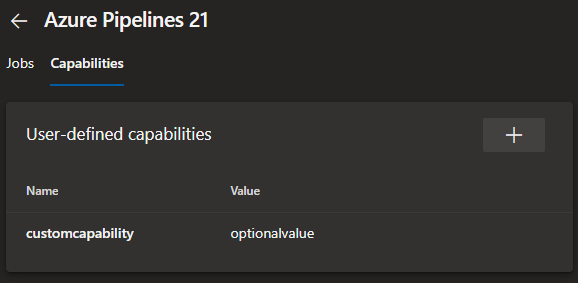
There is nice way to limit the number of agents a build can use (in case say you have a lot of individual jobs to run in parallel), but you can do this by configuring a ‘capability’.
You just need to set a user-defined capability on some of the agents in the pool, then specify that in the Build or Release pipeline.
pool:
  name: Azure Pipelines
  demands: customcapability
Release Pipeline
Though they are considered ‘classic’ pipelines, Release Pipelines can still be a useful way for releasing software, especially for more complex systems. This was helpful for us as it allowed us to release individual services, either manually or programmatically. To support an increasing number of services and reduce the manual workload we were able to create/update a Release pipeline via the REST APIs, this process can be triggered from a Build pipeline when needed, and means we can restrict people’s access so they don’t accidentally (or otherwise) modify a release pipeline.
- You can view the change history of a Release pipeline, just Edit a pipeline and navigate to history
- This is helpful if you are programmatically generating a pipeline instead of manually, which is helpful if the separate deployment units (which are represented as stages) changes over time.
- You can trigger other stages in a Release (or access other REST APIs) from a stage, by checking ‘Allow scripts to access the OAuth token’ the access token becomes available.
$response = Invoke-RestMethod -Uri $restUri -Headers @{Authorization = "Bearer $env:SYSTEM_ACCESSTOKEN"}
Key Vault Integration via Variable Groups
Variable Groups are a cool way of managing many variables in logical groups, i.e. Dev and Prod. They support plain-text or secure variables and can be used by Build or Release pipelines. The secure variables will then be masked in the logs if they are printed. Keeping in mind if you have a secret of say 0, all 0 will be masked in the logs with ***.
If you already manage your systems deployment secrets and/or config settings via Azure Key Vault, you can link that Key Vault to a Variable Group and access it in your pipelines the same way as a secure variable.
A Variable Group cannot be used with Key Vault and non-Key Vault variables, however you can have several Variable Groups and reference them in your pipelines, but you need to be careful if there are variables with the same name as there is no guarantee that the variable from one of the Variable Groups will take precedence over the other.
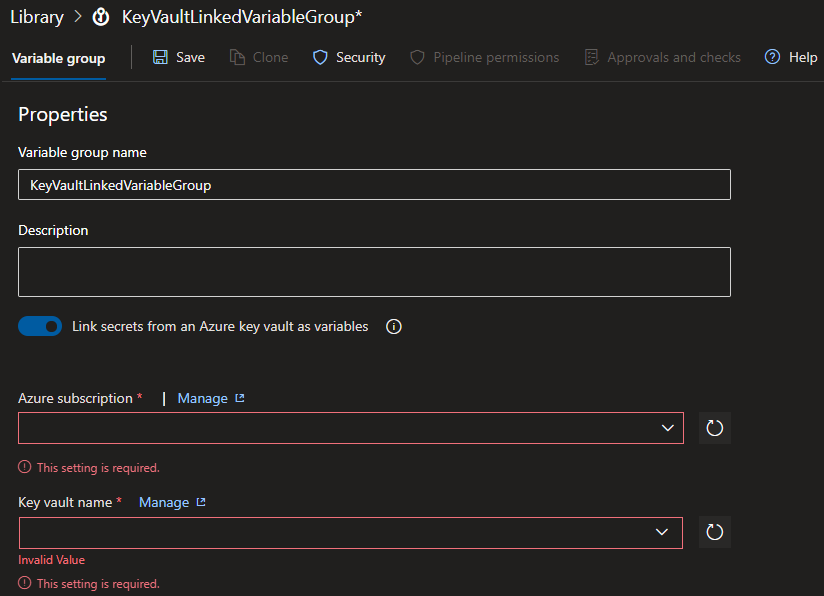
Creating the Variable Group
- Create a Service Connection with access to the Resource Group that contains the Key Vault
- Go to create a Variable Group
- Toggle on
Link secrets from an Azure key vault as variables - In the
Azure Subscriptionsdropdown select the Service Connection - In the
Key vault namedropdown select the Key Vault you want to link to - If prompted, click
Authorizefor the Service Connection to get the required permissions on the Key Vault itself- You could configure this manually too
- Click
+ Addand select which secrets you would like to link - Click
Save- You need to select at least one secret to Save
Then in your pipelines once you’ve linked it to the Variable Group you can access the secret via $(SomeSecretName)
Managing the secrets
If you update an existing secret via the Key Vault that is already linked in a Variable Group, you don’t need to do anything further. Azure DevOps will always pull down the latest secret whenever it is used in a pipeline.
However if you add a new secret to the Key Vault it won’t automatically be available in the Variable Group. Similar to the process of setting up the Variable Group, you’ll need to + Add the secret manually to link it up.
If you remove a secret, there’s a few things to keep in mind. Regardless if you’ve removed the secret from the Key Vault, you need to remove it from the Variable Group (it won’t appear in the `+ Add’ list but will still appear in the list of secrets). If you’re trying to release something, you need to create a new Release after the Variable Group has been updated. If you’re trying to deploy a Release that was created before you removed the secret from the Variable Group, it will still think it’s there.
Links